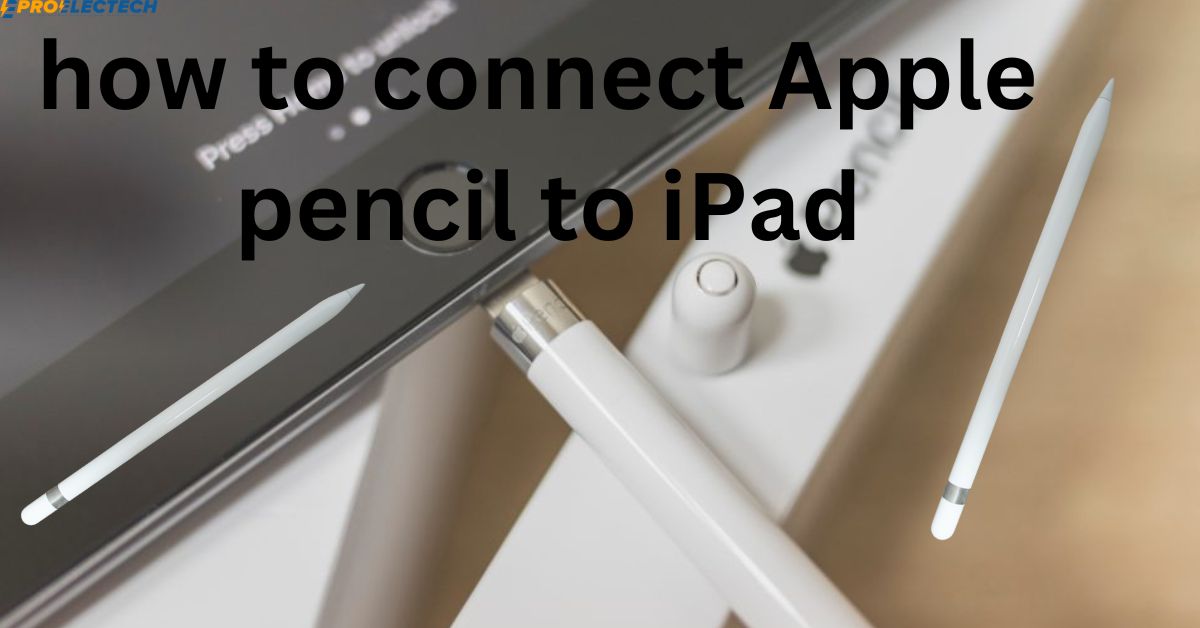
To connect an Apple Pencil to an iPad, attach it to the magnetic connector on the iPad’s side. Once charged, the Apple Pencil will automatically pair with the iPad.
how to connect apple pencil to ipad
This simple process ensures seamless functionality between the devices. Pairing the Apple Pencil enhances the user experience, enabling precise drawing and writing capabilities on the iPad.
By following these steps, users can quickly link their Apple Pencil and iPad for a seamless creative experience.
Additionally, charging the Apple Pencil through the iPad’s Lightning port ensures that it is ready for use whenever needed. Whether for drawing, note-taking, or other tasks, a properly paired Apple Pencil can unlock a world of possibilities on the iPad.
Checking Compatibility
Before connecting your Apple Pencil to your iPad, it’s crucial to ensure compatibility between the two devices. Below, we dive into the specifics of Apple Pencil and iPad Compatibility.
Apple Pencil And Ipad Compatibility
When pairing your Apple Pencil with your iPad, it’s essential to verify that both devices are compatible. Check the compatibility table below for guidance:
| Apple Pencil Generation | iPad Model |
|---|---|
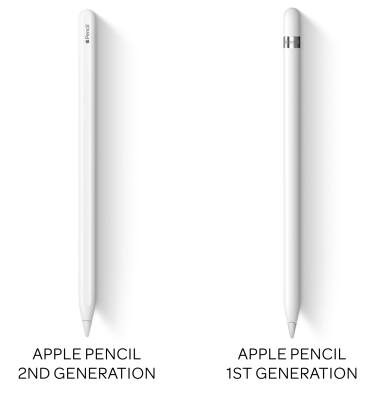
| 1st Generation | iPad (6th Generation) or later |
| 2nd Generation | iPad Pro 11-inch (1st and 2nd generation) and iPad Pro 12.9-inch (3rd generation) or later |
Make sure that both your Apple Pencil and iPad fall within the corresponding categories to facilitate a successful pairing.
Ensuring Compatibility
- Attach Apple Pencil to the magnetic connector on the side of your iPad.
- Check the battery level of your Apple Pencil to ensure sufficient charge.
- If you encounter issues, such as an unresponsive Apple Pencil, try charging it or force-repairing it with your iPad.
By confirming compatibility between your Apple Pencil and iPad, you can seamlessly connect the two devices for enhanced functionality.
Charging The Apple Pencil
The Apple Pencil is a versatile tool that can greatly enhance your iPad experience. However, to ensure that it is always ready to use, it is important to know how to properly charge it. Here are the different methods you can use to charge your Apple Pencil:
Charging Methods
- Using the Lightning Connector:
One way to charge your Apple Pencil is by directly connecting it to the Lightning port on your iPad. Simply remove the cap from the pencil’s end and insert it into the Lightning connector. This will ensure a secure connection and allow the pencil to charge efficiently. Keep in mind that the charging time may vary depending on the current battery level of your Apple Pencil.
- Using an iPad Pro Magic Keyboard or Smart Keyboard Folio:
If you have an iPad Pro with a Magic Keyboard or Smart Keyboard Folio, you can conveniently charge your Apple Pencil by attaching it magnetically to the side of your iPad.
The magnet will hold the pencil in place while charging, ensuring a stable connection. This method is ideal for those who use their iPad with a keyboard accessory. Regardless of the method you choose, it is important to check the battery level of your Apple Pencil regularly.
To do this, you can use the battery widget on your iPad or check the battery percentage in the Bluetooth settings. It is recommended to keep your pencil charged above 20% to ensure optimal performance.
Troubleshooting Unresponsiveness
While the Apple Pencil is known for its reliability, there may be instances where it becomes unresponsive. Here are some troubleshooting steps you can take if your Apple Pencil is not working properly:
- Charge Apple Pencil Battery:
If your Apple Pencil is unresponsive, the first step is to make sure that it is adequately charged. Connect it to the Lightning port or the magnetic connector and allow it to charge for a sufficient amount of time. This can often resolve any connectivity issues and restore functionality to your pencil.
- Reestablish Apple Pencil Connection:
If charging the battery does not solve the problem, you can try reestablishing the connection between your Apple Pencil and iPad. To do this, go to the Bluetooth settings on your iPad and disconnect the pencil. Then, reconnect it by following the same pairing process as when you initially connected the devices.
- Force Re-Pair Apple Pencil:
If the previous steps did not resolve the issue, you can try force re-pairing your Apple Pencil with your iPad. This involves unpairing and repairing the devices, which can sometimes help resolve any persistent connectivity problems.
By following these steps, you can ensure that your Apple Pencil remains charged and responsive, allowing you to fully enjoy its features and capabilities while using your iPad.
Pairing Process
When setting up your Apple Pencil with your iPad, the pairing process is essential to ensure a seamless connection. It is a straightforward process that allows your Apple Pencil to communicate with your iPad effortlessly.
Pairing 1st Generation Pencil
To pair your 1st Generation Apple Pencil with your iPad, simply plug the Pencil’s Lightning connector into your iPad’s Lightning port. Once connected, a notification will appear on your screen indicating a successful pairing.
Pairing 2nd Generation Pencil
For the 2nd Generation Apple Pencil, attach the Pencil to the magnetic connector located on the side of your iPad (near the Volume buttons). Once securely attached, the iPad will automatically recognize and pair with the Apple Pencil.
Connecting And Using
Connecting and using the Apple Pencil with your iPad is a seamless process that enhances your creative capabilities. Whether you’re an artist, designer, or simply enjoy taking notes, the Apple Pencil provides precision and responsiveness to make your iPad experience even better.
Connecting To Magnetic Connector
To connect your Apple Pencil to your iPad, follow these simple steps:
- Begin by removing the cap from your Apple Pencil.
- Locate the magnetic connector on the side of your iPad, below the Volume buttons.
- Gently insert the tip of the Apple Pencil into the magnetic connector until you feel it snap into place.
- Ensure the Apple Pencil is securely attached to the magnetic connector to establish a stable connection.
Note: The magnetic connector ensures a reliable connection and also charges your Apple Pencil while attached to your iPad.
Using The Apple Pencil
Once your Apple Pencil is connected, you can start using it to unleash your creativity:
- Drawing and Sketching: With the Apple Pencil’s pressure sensitivity and precise tracking, you can effortlessly create detailed drawings and sketches on your iPad.
- Writing and Note-Taking: Take advantage of the Apple Pencil’s smooth writing experience to jot down notes, make annotations, or highlight important information.
- Editing and Designing: The Apple Pencil offers accurate control when editing photos, designing graphics, or working on creative projects.
With the Apple Pencil in hand, your iPad becomes a versatile tool that enhances your productivity and unleashes your artistic potential. Remember to keep your Apple Pencil charged and securely attached to the magnetic connector when not in use to ensure it’s ready for your next creative endeavor.
Maintaining The Connection
Connecting your Apple Pencil to iPad is just the start. To ensure seamless functionality, it’s crucial to maintain the connection between the two devices. By understanding the steps to keep the Apple Pencil and iPad paired, you can maximize your productivity and creativity without any interruptions.
Keeping The Devices Paired
Once you’ve established the initial connection between your Apple Pencil and iPad, it’s essential to keep them paired consistently. This ensures that the pencil is always ready for use whenever you need it. Additionally, a stable connection is vital for a smooth and responsive drawing or writing experience. To maintain the pairing, here are a few tips:
- Regularly check the battery level of your Apple Pencil to avoid any unexpected disconnections.
- Keep your iPad and Apple Pencil within a reasonable range to maintain a strong and stable Bluetooth connection.
- Re-establish the connection between the two devices if you encounter any issues with responsiveness or connectivity.
Ensuring Seamless Functionality
To ensure the seamless functionality of your Apple Pencil and iPad, it’s essential to periodically check the compatibility and responsiveness of the pencil with your device. Here are some simple steps to ensure everything is working as expected:
- Regularly check the battery level of your Apple Pencil to avoid any unexpected disconnections.
- Keep your iPad and Apple Pencil within a reasonable range to maintain a strong and stable Bluetooth connection.
- Re-establish the connection between the two devices if you encounter any issues with responsiveness or connectivity.
By following these practices, you can maintain a reliable connection between your Apple Pencil and iPad, ensuring a seamless and hassle-free user experience. Now, you can focus on your creativity while your devices work together flawlessly.

Common Issues
When it comes to connecting an Apple Pencil to an iPad, there are common issues that users may encounter. These issues can hinder the seamless pairing and usage of the Apple Pencil with the iPad. Understanding these issues and their solutions can help users make the most out of their Apple Pencil experience.
Unresponsive Apple Pencil
If your Apple Pencil is unresponsive, there are a few troubleshooting steps you can take to resolve this issue:
- Charge the Apple Pencil battery.
- Reestablish the Apple Pencil’s connection with your iPad.
- Force re-pair the Apple Pencil with your iPad.
Pairing Problems
Pairing problems between the Apple Pencil and iPad can be frustrating, but there are steps you can take to ensure a successful pairing:
- Attach the Apple Pencil to the magnetic connector on the side of the iPad.
- Check the battery level of the Apple Pencil.
- If the pairing button appears, tap it to pair the Apple Pencil with the iPad.
By addressing these common issues, users can ensure a smooth and efficient connection between their Apple Pencil and iPad, allowing for a seamless and enjoyable drawing and writing experience.
Credit: www.att.com
Frequently Asked Questions on how to connect apple pencil to ipad
How Do I Pair An Apple Pencil To My Ipad?
To pair an Apple Pencil to your iPad, attach the pencil to the magnetic connector on the side of the iPad. Once the Apple Pencil is charged, it will automatically pair with your tablet.
Why Won’t My Apple Pencil Work On My Ipad?
To use your Apple Pencil on iPad, charge it and then attach it to the magnetic connector on your tablet.
How Do I Turn On My Apple Pencil 2?
To turn on your Apple Pencil 2, simply plug it into your iPad’s Lightning port.
How Do I Turn On My Apple Pencil 1?
To turn on your Apple Pencil 1, simply plug it into the Lightning port on your iPad. There is no on/off button.
How do I pair an Apple Pencil to my iPad?
To pair an Apple Pencil with your iPad, simply follow these steps:
- Remove the cap from your Apple Pencil.
- Plug your Apple Pencil into the Lightning connector on your iPad.
- A pairing request will appear on your iPad’s screen. Follow the on-screen instructions to complete the pairing process.
- Once paired, your Apple Pencil is ready to use with your iPad.
Why won’t my Apple Pencil work on my iPad?
If your Apple Pencil isn’t working on your iPad, try these troubleshooting steps:
- Make sure your Apple Pencil is fully charged.
- Check that your Apple Pencil is paired correctly with your iPad.
- Ensure that your iPad is compatible with the Apple Pencil model you are using.
- Restart your iPad and try using the Apple Pencil again.
- If the issue persists, contact Apple Support for further assistance.
How do I turn on my Apple Pencil 2?
To turn on your Apple Pencil 2, simply double-tap the flat side of the pencil. You’ll see a small indicator light appear to confirm that it’s turned on and ready to use.
How do I turn on my Apple Pencil 1?
To turn on your first-generation Apple Pencil, follow these steps:
- Remove the cap from the back of the pencil.
- Insert the Lightning connector into the Lightning port on your iPad.
- A pairing request will appear on your iPad’s screen. Follow the on-screen instructions to complete the pairing process.
- Once paired, your Apple Pencil 1 is ready to use with your iPad.
how to connect apple pencil to ipad 10th generation
To connect your Apple Pencil to your 10th generation iPad, follow these steps:
-
Charge the Apple Pencil: If it’s not already charged, connect the Apple Pencil to the Lightning connector on your iPad or use the Apple Pencil charging adapter to charge it with a Lightning cable.
-
Remove the Cap: If your Apple Pencil has a cap covering the Lightning connector, remove it.
-
Locate the Charging Port: On your iPad 10th generation, locate the Lightning connector port. It’s usually at the bottom of the device.
-
Connect the Apple Pencil: Insert the Lightning connector of the Apple Pencil into the Lightning port on your iPad.
-
Follow On-Screen Instructions: Once connected, your iPad should recognize the Apple Pencil. Follow any on-screen instructions that appear to complete the setup process.
-
Confirmation: You’ll typically receive a confirmation message or indication that the Apple Pencil is connected and ready to use.
Once connected, you should be able to use the Apple Pencil for various tasks on your iPad 10th generation, such as drawing, writing, and navigating the interface.
how to connect apple pencil to ipad pro
To connect your Apple Pencil to an iPad Pro, follow these steps:
- Remove the cap from the back of the Apple Pencil.
- Insert the Lightning connector on the Apple Pencil into the Lightning port on your iPad Pro.
- A pairing prompt should appear on the iPad Pro’s screen.
- Tap on the “Pair” button to complete the connection process.
- Once paired, you can start using the Apple Pencil with your iPad Pro for drawing, writing, and other tasks.
Make sure your Apple Pencil is charged before attempting to pair it with your iPad Pro. You can charge the Apple Pencil by connecting it to the Lightning port of your iPad Pro or using a Lightning cable and adapter.
Conclusion
To link your Apple Pencil to iPad, simply attach it to the magnetic connector. Charging ensures pairing. If unresponsive, charge, reestablish connection, or force re-pair. No designated button; plug into the Lightning port. Remember to turn on Bluetooth for charging.
Enjoy drawing with your Apple Pencil seamlessly.
